Home / Road Trips / New 347 Stroker / Restoration Tips / Contact Us / Links of Interests / Dixieweb
Home / Road Trips / New 347 Stroker / Restoration Tips / Contact Us / Links of Interests / Dixieweb
|
Thunderbolt's New 347 Stroker
When we first began our restoration on Thunderbolt we were amazed to find its original engine in good working order. The old 302 hadn’t been running in years, and we were skeptical about its condition, but, after replacing its old corroded carburetor and giving it a basic tune-up [plugs, points, oil change, etc.], the old power plant fired right up. The engine ran surprisingly well, with no smoke, oil leaks, and with plenty of power, but it was nothing to look at. We cleaned the engine the best that we could, but it was obvious the motor was going to need some attention. At first we considered buying a complete engine for our car, but where is the fun in that? We also pondered the idea of replacing the engine with a 427 Stroker [351w based], but with fuel prices at record levels, we backed away from that plan. After all, we wanted to actually drive and tour in our car. And with a convertible, I think there can be too much horsepower. After doing a whole lot of research, and quite a bit of punching on the calculator, we decided on building a 347 Stroker. The engine would be 302 (5.0) based, but we didn’t want to use our original motor. The engine was numbers matching, and we wanted to reserve it for the future. If we ever wanted to return the vehicle back from a restomod to a restoration, we would still have all the original parts.
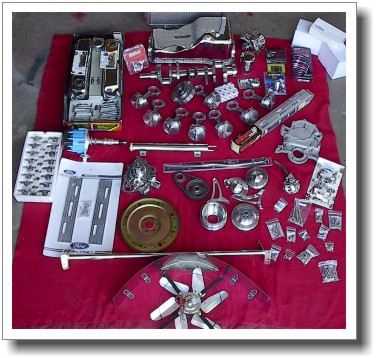
We then were able to locate and purchase a stroker kit on Ebay. The kit contained hyperpeutectic pistons, I-beam rods, a cast steel crank, rings, and bearings. The kit would be perfect for our application. We wanted to build a good street engine and wouldn’t be running nitrous or a blower. We also found a set of GT-40 aluminum heads on the auction site. These have 1.94”/1.54” valves and will also suit our street engine well. We are building for torque rather that horsepower. Most of the rest of our parts we found through companies like Jegs and Summitt Racing. Our crank we had purchased had a 28 ounce imbalance, so we purchased a Streetdampr fluid damper and B&M flexplate to match our application. Some 302’s are 50 ounce, so be sure to check if you’re building a Ford 5.0. Other parts included a windage tray, Holley Street Dominator intake [bright zinc fish], Holley fuel pump and Pertonix HEI distributor. We then took our block and rotating assembly to Mike’s Speed Shop in Murfreesboro, Tennessee. There the block was cleaned, checked for defects, line honed, bored, and notched for rod clearance [the cylinder skirts have to be notched to accept the larger stroker crank]. The bearings were also checked for clearance, and the assembly was balanced for longer life and reduced vibration. For our cam we went with a Comp Extreme Energy Roller Cam. Again the cam was to fit our street engine application with a 1300-5600 rpm range. It has a 274-duration, with .555/.565 lift. We found that cam selection is probably the most difficult item to select, with so many variables that need to be considered. Things like what the vehicle will be used for, transmission type, gear ratio, and tire and wheel size need to be considered when buying the right cam. But, a simple call to Comp, with all the relative information, made choosing a whole lot simpler.
To fix the problem we purchased an aluminum radiator from Griffin. The company offers direct bolt-in aluminum replacements for older cars. In addition, we added a 17” Perma-cool electric fan, aluminum fan shroud and brushed aluminum overflow tank. With all the work we were doing, we also wanted the engine to look good. Thunderbolt’s chrome bumpers and wheels shine brightly against its shiny black paint job, and we decided that whatever could be chrome or polished on our new engine should be so. It’s a restomod and some bling-bling is almost required. Some of the decorative items we purchased included; chrome braces, shock tower caps, an engine compartment dress up kit [polished trim around the fenders and radiator support], and a serpentine pulley conversion kit from March Performance. The pulleys not only looked good, they also provided increased water flow and less chance of throwing a belt. May 2, 2005 - While at the machine shop there were some issues discovered with the block that needed to be addressed. While being cleaned and bored we also had the block and crank checked for bearing clearance. The result was a negative clearance between the crank and bearings. There was not enough room between the crank and bearings to allow for lubrication. If we had not had this check performed we would have ended up with some scored bearings. To fix the problem we had the crank turned to the proper specs. Also the guide plates did not align with the rocker studs. We assume this problem is caused by a different head design between the stock heads and the aluminum GT-40 heads. To fix this problem we will slightly oblonged the mounting holes on the guide plates. With all the parts back, Joseph Overstreet, with Overstreet Performance, is now working on port matching the heads to the intake. This will allow for better flow. May 12, 2005 - The new engine is now assembled and resting comfortably in its new home. When the old motor was removed we decided it was a perfect time to detail the engine compartment. Overstreet Performance cleaned and painted the engine area and repaired some suspect metal near where the fenders bolt on. The compartment was painted flat black to help highlight all the bling-bling we've installed. All the chrome really stands out compared to the black. One issue we had to address was with the GT-40 heads. There were two threaded holes in each head that were connected to the exhaust ports. These are used with pollution control devices, but with us living in Tennessee we're not concerned with such trivialities. We needed to plug them. But to our surprise the holes required a special coarse thread plug, not something you can acquire at your local auto parts store. Luckily Mike's Speed Shop had the required items. If you buy GT-40 heads make sure you have these plugs. Also while the engine was out, we decided to take the power steering pump reservoir and have it chromed. It has been taken to The Chrome Wizard in Nashville and should be back soon. In addition we decided to trade our Holley 600 in for a Barry Grant Road Demon 625cfm carb, and we're trying to decide on whether to use a Mr. Gasket "butterfly" Street Scoop II air intake or a Hilborn style air scoop. We'll have to check the hood clearance before making our decision. May 14, 2005 - "It's alive ... It's alive!" - We were able to start our new stroker for the first time last night. The engine is even better than we expected it to be. The throttle response with the new Road Demon carb and the HEI distributor are excellent (and a bit scary). I'll have to learn to drive this car all over again. Now all that is left is to install some additional dress-up items, such as chrome flex heater hoses, electric fan, and engine compartment brushed aluminum trim, and install some stainless tubing that will be used for vacuum lines. We are also still waiting on our parts to come back from the chromer. We've also measured the hood clearance and decided to use a Street Scoop II air induction, from Mr. Gasket, atop our carb. We found a very nice used scoop from a local car lot. The scoop fits underneath the Shelby style hood with about a half inch to spare. In the meantime Overstreet Performance will be working on some minor body repair in preparation for some upcoming car shows.
The car's final paint and body work ended with deleted body lines in the rear of the car. The vehicle received a base coat, clear coat, with Matrix paint. It was then cut and buffed, resulting in a mirror-like finish. The final work on the engine was not without problems though. A week before the show, while doing a bit of test driving, :) I managed to drop a valve. I know you're saying, "That's serious," but it wasn't as bad as it seemed. After pulling the engine apart we determined that the 1.7 roller rockers that we had used were just too much. I had originally ordered 1.6 rockers, but when they arrived we discovered they had sent 1.7's. Against my instinct we decided to try them. They worked fine at first. But, after about the third time I "got on it" one valve touched a piston just enough to warp it. With the size cam we were using the rockers were pushing just over our clearance limit under a load. The tear down revealed no damage to the piston or head, but a push rod also succumbed to our miscalculation. One thing we did discover is that valves for GT40 heads are not readily available. Every place I called said they could be special ordered, with two to three weeks delivery. This wouldn't do with a show in a week, so I found K&J Transport Solutions in Cookeville, Tennessee, who was able to overnight a Ferrera valve that is a direct replacement for the GT40 valve. With the new valve and push rod we were soon back in business, just in time for the show. Some Things We've Learned Blinking headlights – After our restoration project we noticed a problem with our lights. The headlights would start blinking on and off and eventually go out altogether. This seemed like a loose wire or bad connection, but after checking we could find no problem. After looking over the car’s wiring schematic, the fix turned out to be the headlight switch.
Back seats for convertibles – When we purchased our Mustang the back seat frame was in bad shape. The upholstery was rotten and several springs were rusted and broken. When we took the seat to an upholstery shop we found they wanted an enormous amount to repair it. Something like $30 per spring. Not wanting to pay that much for seat repair we went in search of a donor seat. We found plenty of seats for coupes, but none for convertibles. Coupe backseats are the same as a convertible’s except they are several inches longer or wider. Our fix was to buy a coupe seat, measure and cut it, and weld it back together. After the upholstery was on, it looked perfect.
|
Home / Road Trips / New 347 Stroker / Restoration Tips / Contact Us / Links of Interests / Dixieweb
Web design by![]()
times@dixieweb.com
 Over the past few weeks we have begun a new project for our 1968 Mustang, the installation of a 347 stroker. As we build the engine I’ll try to update the progress of the project and will have photos soon.
 After traveling to several local junk yards we were able to find a suitable 5.0 roller block for our project. Since Thunderbolt was a restomod we wanted to modernize the engine. We actually bought the block as a complete engine [heads, intake, timing cover, etc.], but paid only for the block itself. After some greasy work, soon found why the engine had been at the junk yard, a spun bearing. The spun bearing didn’t concern us though; we were going to use all new internal parts anyway.
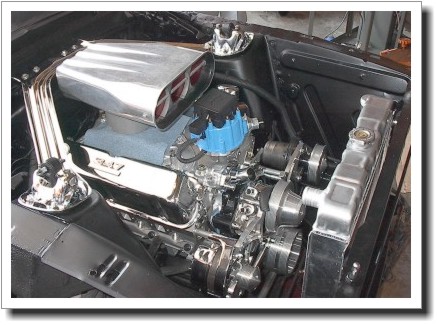 Another upgrade to our Mustang was a new radiator. In my experience, all the old Mustangs run hot. This was true with ours, especially in the hot summer months. The car would run at a decent temperature until we would get caught at a stoplight. Then the temperature gauge would shoot up until we started moving again. This problem would only be aggravated with the new stroker. The larger bore and thinner cylinder walls would increase the engine’s temperature.
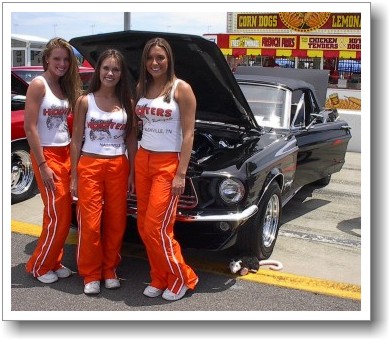
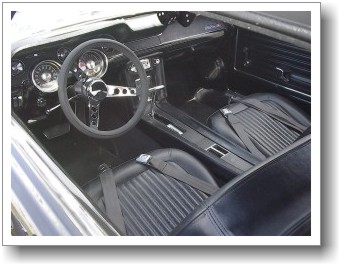 Buying a center console – When searching for a console there are a few things you should know. Not all consoles are the same. For instance a center console for a 68 coupe is different than the one for a convertible. Convertibles have extra bracing in the floor of the car for added support. The bracing adds a hump across the floor; therefore consoles for convertibles have to compensate for this bracing by notching underneath. Be sure to check this before buying one.